Password Protecting JMXMP (3.1.1+)
By default there is no authentication of client connections to the default JMXMP connector. Since 3.1.1 password protection can be enabled through a number of additional properties in bootstrap.properties which will enable a SASL callback handler which verifies the supplied username and password combination.
| Property | Description |
|---|---|
| jmxserviceurl.jmxmp.username | The username |
| jmxserviceurl.jmxmp.password | The password which may be encoded using the password handling mechanism. |
By setting the username property; the jmx.remote.profiles JMX environment property will be set to SASL/PLAIN if not already set. You can override this and dictate all the profiles required by specifying your own JMX environment in bootstrap.properties. For instance you might want to set jmx.remote.profiles to be TLS SASL/PLAIN but this will require additional configuration and use of the javax.net.ssl.* system properties.
Once you have password protected JMXMP, then your client code will also need to set the jmx.remote.profiles property and pass in the appropriate credentials when connecting to JMX
HashMap env = new HashMap();
// ... Some other stuff happens with env

if (!env.containsKey("jmx.remote.profiles")) {
  env.put("jmx.remote.profiles", "SASL/PLAIN");
  env.put(JMXConnector.CREDENTIALS, new String[] {"myusername", "password"});
}
JMXConnector connector = JMXConnectorFactory.connect(new JMXServiceURL("service:jmxmp://localhost:5555"), env);
Connecting via the UI with credentials
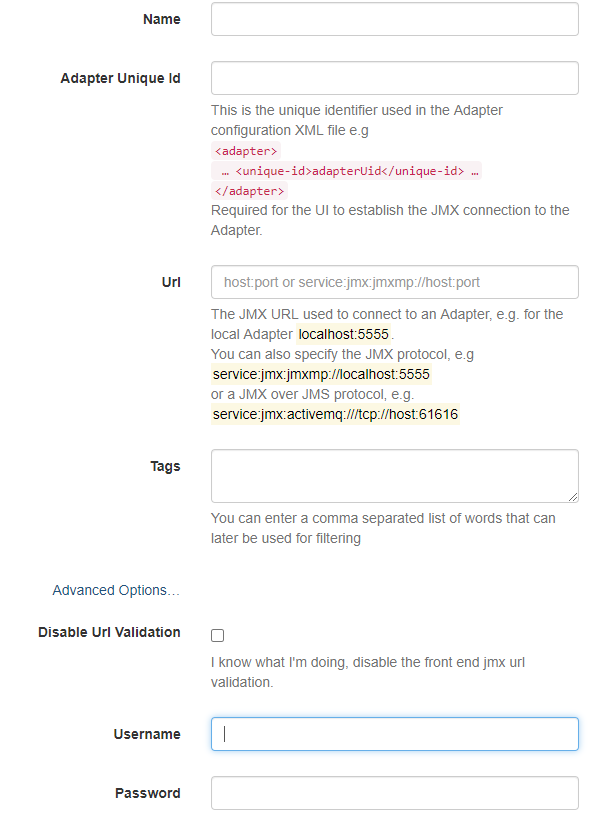
If you are securing JMX as mentioned above, then you must also provide those credentials to the Interlok UI.
When adding an Interlok instance to your UI dashboard simply select the Advanced Options and enter your chosen username and password as shown here;

Connecting with JVisualVM
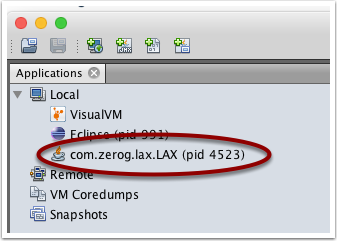
Local
For an adapter running locally, for example on a developer workstation, just select the adapter from the left panel of the JVisualVM interface. The name of the adapter main class is com.zerog.lax.LAX.

Remote
When the adapter is running on a remote server it is necessary to add jmxremote_optional.jar to the classpath of VisualVM. This file is included in the Interlok lib directory. Alternatively, download the “Java Management Extensions (JMX) Remote API Reference Implementation” from Oracle. At the time of writing, the latest version is located at: http://www.oracle.com/technetwork/java/javasebusiness/downloads/java-archive-downloads-java-plat-419418.html
To run JVisualVM, use this command:
$ jvisualvm --cp:a lib/jmxremote-optional.jar
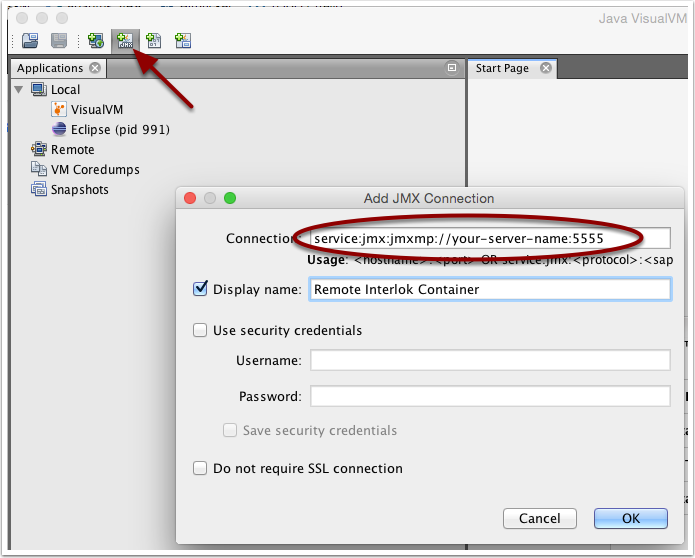
When JVisualVM starts, use the following settings to connect to the adapter JVM:

The required connection information can be found in config/bootstrap.properties. The property jmxserviceurl indicates the protocol and port number to use. The default value is service:jmx:jmxmp://localhost:5555, which means the protocol is jmxmp and the port is 5555. Copy this url into JVisualVM and update the hostname to match the server the adapter runs on.
Through a firewall
Commonly, the adapter server is not directly reachable from the internet or a firewall is blocking access to port 5555. Since the JMX protocol doesn’t use authentication by default it would be very ill-advised to expose the JMX port directly to the internet. There are several solutions to still be able to access the JMX management interface.
- JMX over JMS
- Open a firewall port (not recommended)
- Use SSH port forwarding
To use SSH port forwarding, use a command like the following:
$ ssh -L15555:adapter-host:5555 proxy-host
This creates an SSH connection to “proxy-host” and forwards port 15555 on your local machine to port 5555 on the “adapter-host”. Proceed to connect JVisualVM to “localhost:15555” and the connection will be forwarded as if you were connecting directly to the adapter server. A full discussion of SSH port forwarding and all possibilities is out of scope for this document. Please refer to the documentation of your SSH client for all options.
Scripted JMX command line
In some cases you will want to control the adapter without resorting to a GUI interface like the bundled UI; there are a number of open source / freeware tools that can be used to achieve this; we will focus on jmxsh which is available from http://code.google.com/p/jmxsh/ as an example of how to do this.
Jmxsh uses Simon Tuff’s “OneJar” which means that all the required libraries are in a single monolithic jar, we will have to patch it to make all the jmx remote libraries.
- Extract that jar ($JMXSH_TMP)
- Copy jmxremote.jar and jmxremote_optional.jar into $JMXSH_TMP/lib
- Rejar it using (cd $JMXSH_TMP; jar -cvfm ../jmxsh.jar META-INF/MANIFEST.MF *)
- You now have a patched jmxsh.jar
It’s beyond the scope of this document to be a full reference to jmxsh, you will find the authors documentation a useful reference - http://code.google.com/p/jmxsh/wiki/Summary. Running it interactively is the best way to browse the MBeans that are available, and what commands can be issued.
For the purposes of this example, our adapter configuration specifies an adapter unique id of “adp-jmx”. It is running on the host 192.168.72.50; you can stop the adapter by invoking requestClose on the AdapterManagerMBean
jmx_connect -s "service:jmx:jmxmp://192.168.72.50:5555"
jmx_invoke  -m "com.adaptris:type=Adapter,id=adp-jmx" requestClose

