Installation
Installation is pretty easy. Download the installer, and execute it; due to a change in Java licensing as of 2019 you need to provide your own 64bit JVM.
Unix
- Download the unix installer and execute it from a prompt after download
sh ./interlok-install-{version}.bin - The default installation mode is console, in order to use the GUI installer, invoke the binary with the -i gui switch.
Windows
- Download the appropriate windows installer and execute it.
- On Windows 2012 R2 you may have to run the installer in Windows 7 compatibility mode.
Elevated Rights
Because on Windows you can install the adapter as a service; then the installer will ask for elevated rights; in the instance that you cannot provide elevated rights then you can force the installer to run as the invoker. This means, of course, that you will not be able to install the adapter as a service. You need to set the __COMPAT_LAYER environment variable to be RUNASINVOKER before starting the installer.

Windows DLL failed to load
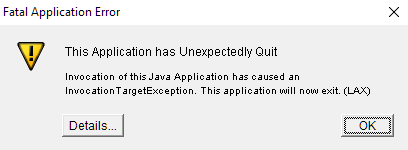
On some Windows platforms (consistently Windows 10 x64); the installer may never start and always fails with a This Application unexpectedly quit exception. This is a problem with the installer and later versions of Java 8. Java 1.8.0_51 is known to work, but later versions may not (the exact circumstances are unclear); it generally always works on Windows 7. It only affects the installer and not the application runtime.

Flexeraawm$aaa: Windows DLL failed to load
	at Flexeraawm.af(Unknown Source)
	at Flexeraawm.aa(Unknown Source)
	at com.zerog.ia.installer.LifeCycleManager.init(Unknown Source)
	at com.zerog.ia.installer.LifeCycleManager.executeApplication(Unknown Source)
	at com.zerog.ia.installer.Main.main(Unknown Source)
	at sun.reflect.NativeMethodAccessorImpl.invoke0(Native Method)
	at sun.reflect.NativeMethodAccessorImpl.invoke(NativeMethodAccessorImpl.java:62)
	at sun.reflect.DelegatingMethodAccessorImpl.invoke(DelegatingMethodAccessorImpl.java:43)
	at java.lang.reflect.Method.invoke(Method.java:498)
	at com.zerog.lax.LAX.launch(Unknown Source)
	at com.zerog.lax.LAX.main(Unknown Source)
If you are in this situation, you should install with the bundled JRE (using install-with-jre.exe); selecting the bundled JRE as the java runtime to use. After installation, edit the adapter.lax file and modify java location to your preferred version. Doing it this way allows you to uninstall the application from the control panel; otherwise you have to use the Uninstall.exe LAX_VM="path/to/a/1.8.0_51/java" from the commandline in order to uninstall.
Starting with an alternate JVM
On Some platforms; you may not be able to execute the installer without explicitly providing path to the java executable. This can be done by passing in the LAX_VM switch on the commandline and works on both Windows and Unix platforms. On Unix systems; if you installed java via the distribution repos, then you may not have a JAVA_HOME environment variable; the installer may not be able to find java.
.\install-without-jre.exe LAX_VM "C:\Program Files\jdk1.8.0_102\bin\javaw.exe"
sh ./install-without-jre.bin LAX_VM "/docker-java-home/bin/java"
Unattended Installation
It is possible to install the framework unattended; this makes it suitable for embedding part of a scripted deployment. In order to perform unattended installation you will need to create a response file to cover the various questions that are asked during installation. This can then be passed into the installer using the -f parameter (/f on windows) e.g. ./install.bin -f silent.ini.
COMPANY_NAME=<My Company Name>
USER_INSTALL_DIR=<My Installation Directory>
INSTALLER_UI=silent

# Don't install as a service (1=install as service) - Windows platforms only
INSTALL_AS_SERVICE=0

# Only required if you aren't installing with the JVM bundle.
JDK_HOME=/opt/java/jdk1.7
JAVA_DOT_HOME=/opt/java/jdk1.7
JAVA_EXECUTABLE=/opt/java/jdk1.7/bin/java

